 Vibelets
How to add Vibelets to ChatGPT
Install the Vibelets plugin, connect your account and build your first app in a ChatGPT conversation.
Before you start
Sign in to ChatGPT and open Customize → Plugins. The screenshots below show the English interface. You will connect a Vibelets account during installation; if you already use Vibelets, sign in to that same account to keep your apps together.
Find Vibelets in Plugins
In ChatGPT, choose Customize → Plugins and search for Vibelets.
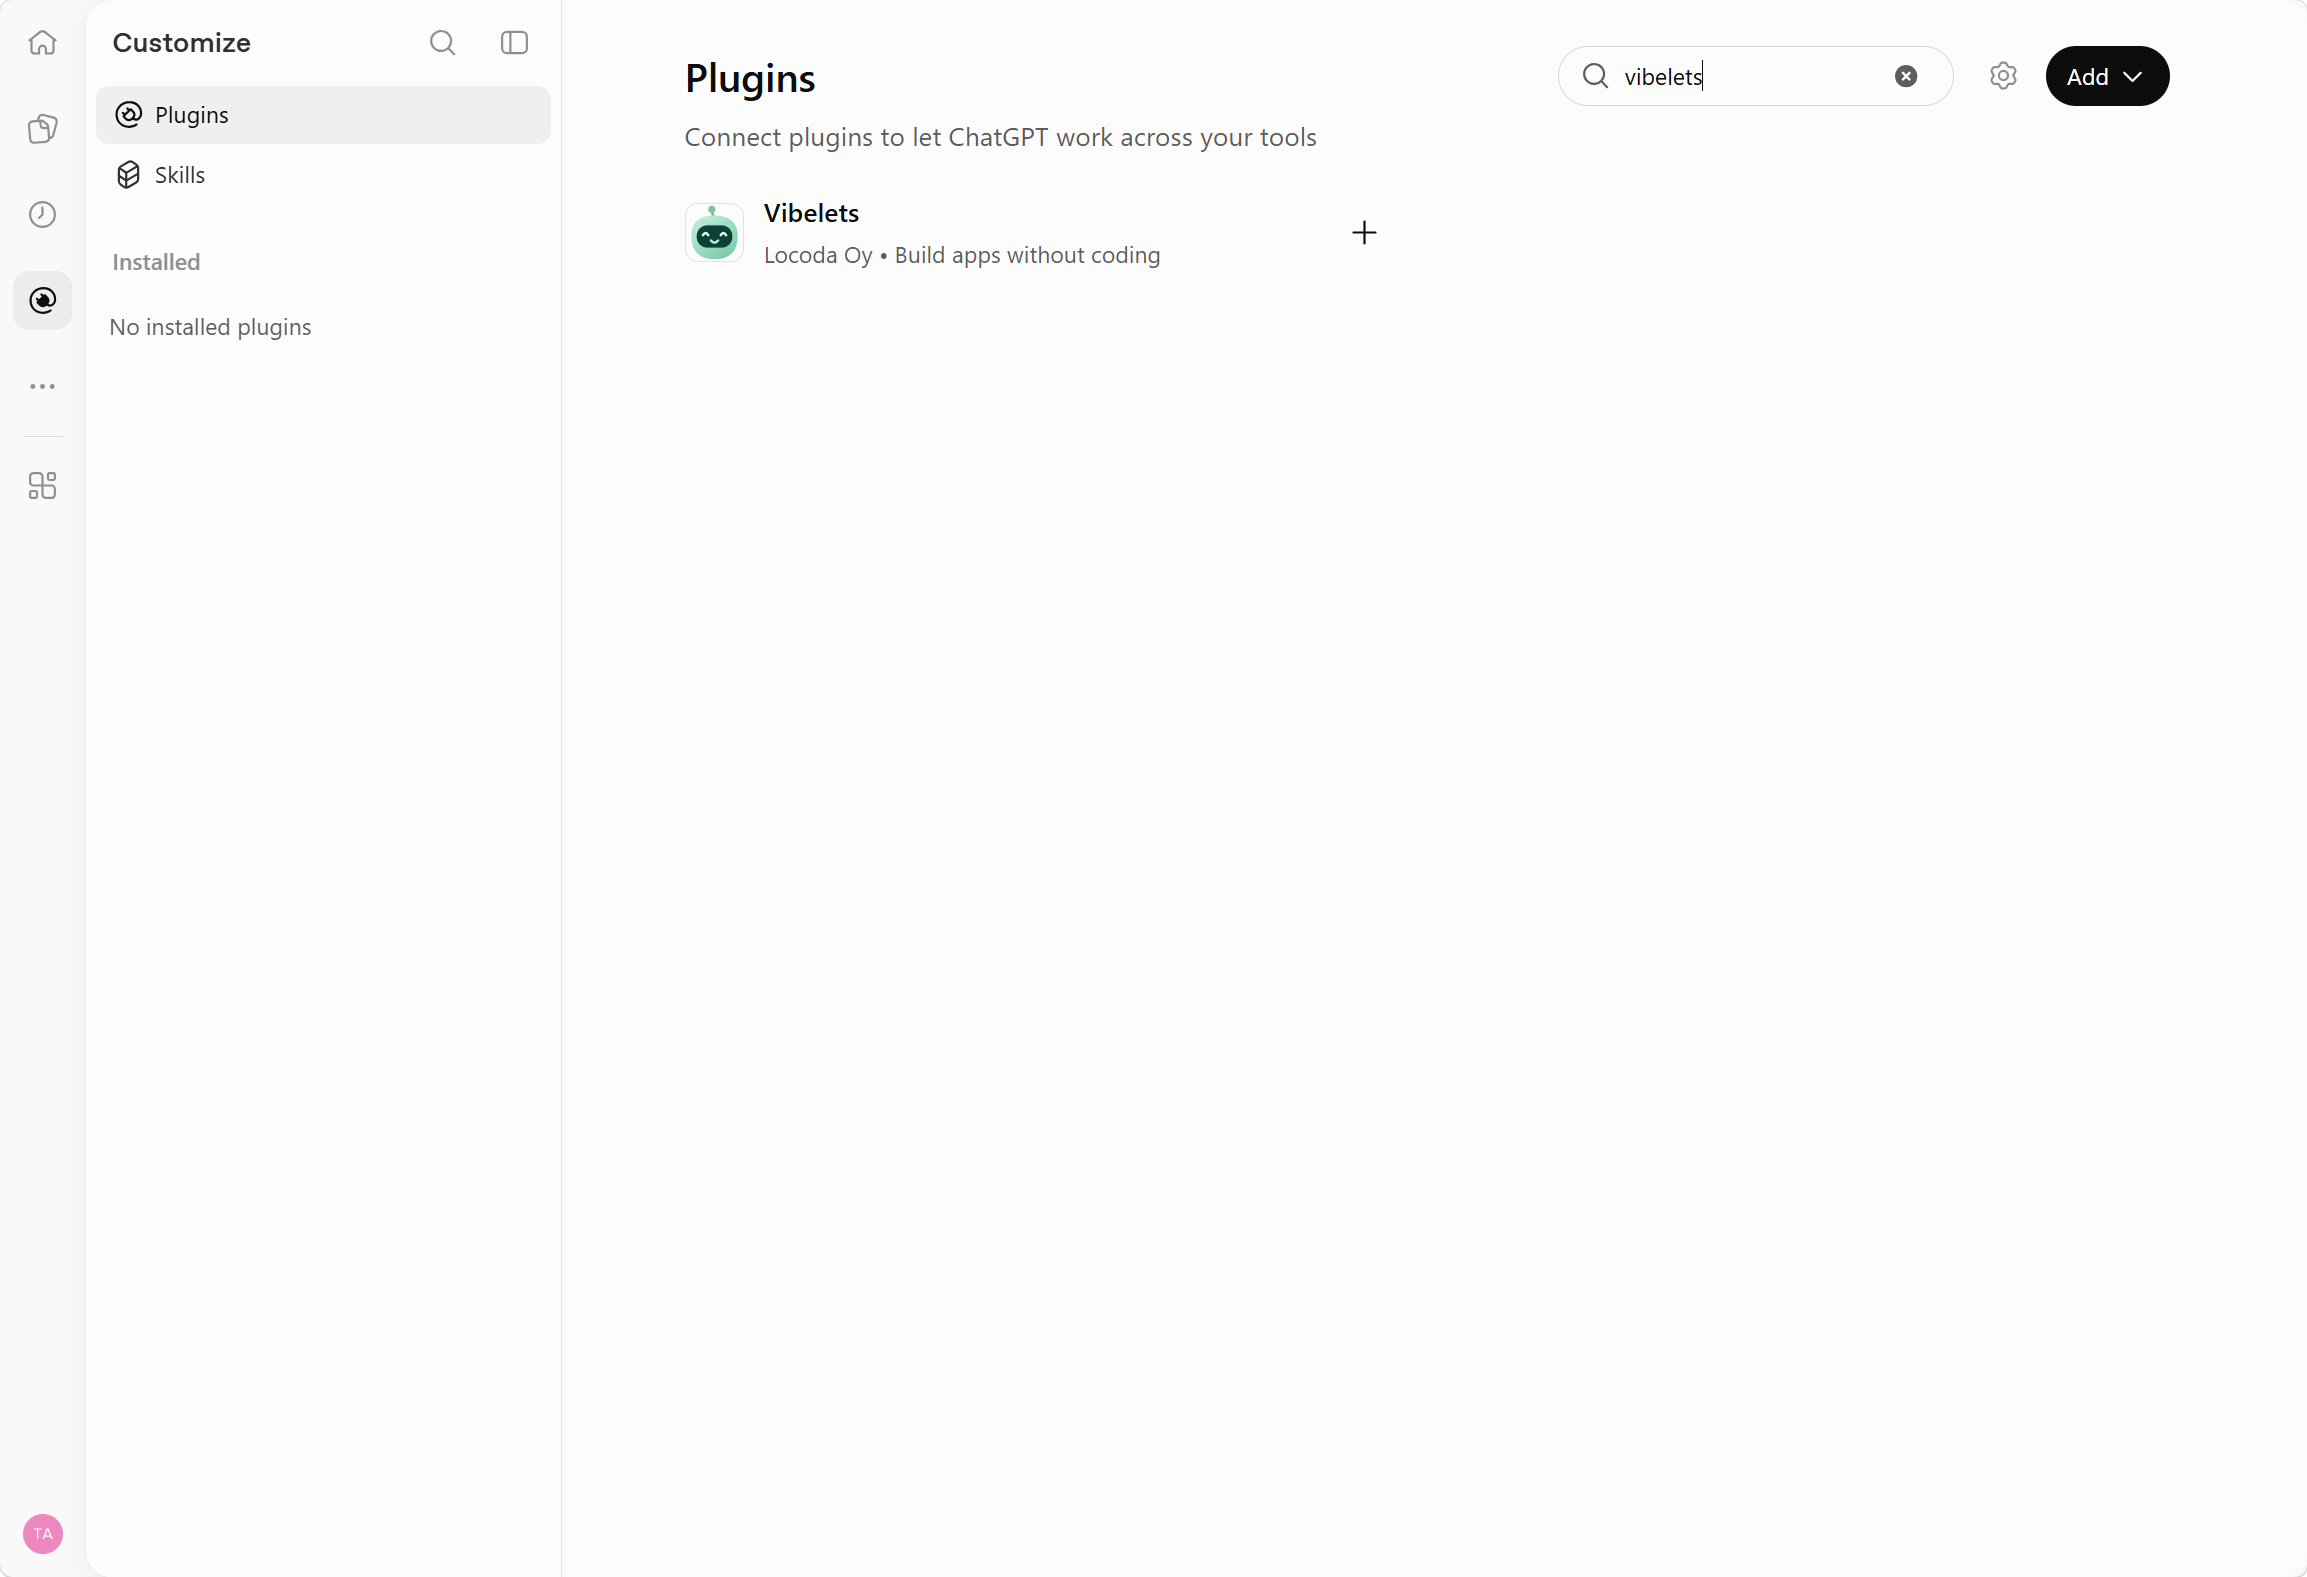
Search for Vibelets in the Plugins library. Install the plugin
On the Vibelets page, select Install plugin in the upper-right corner.
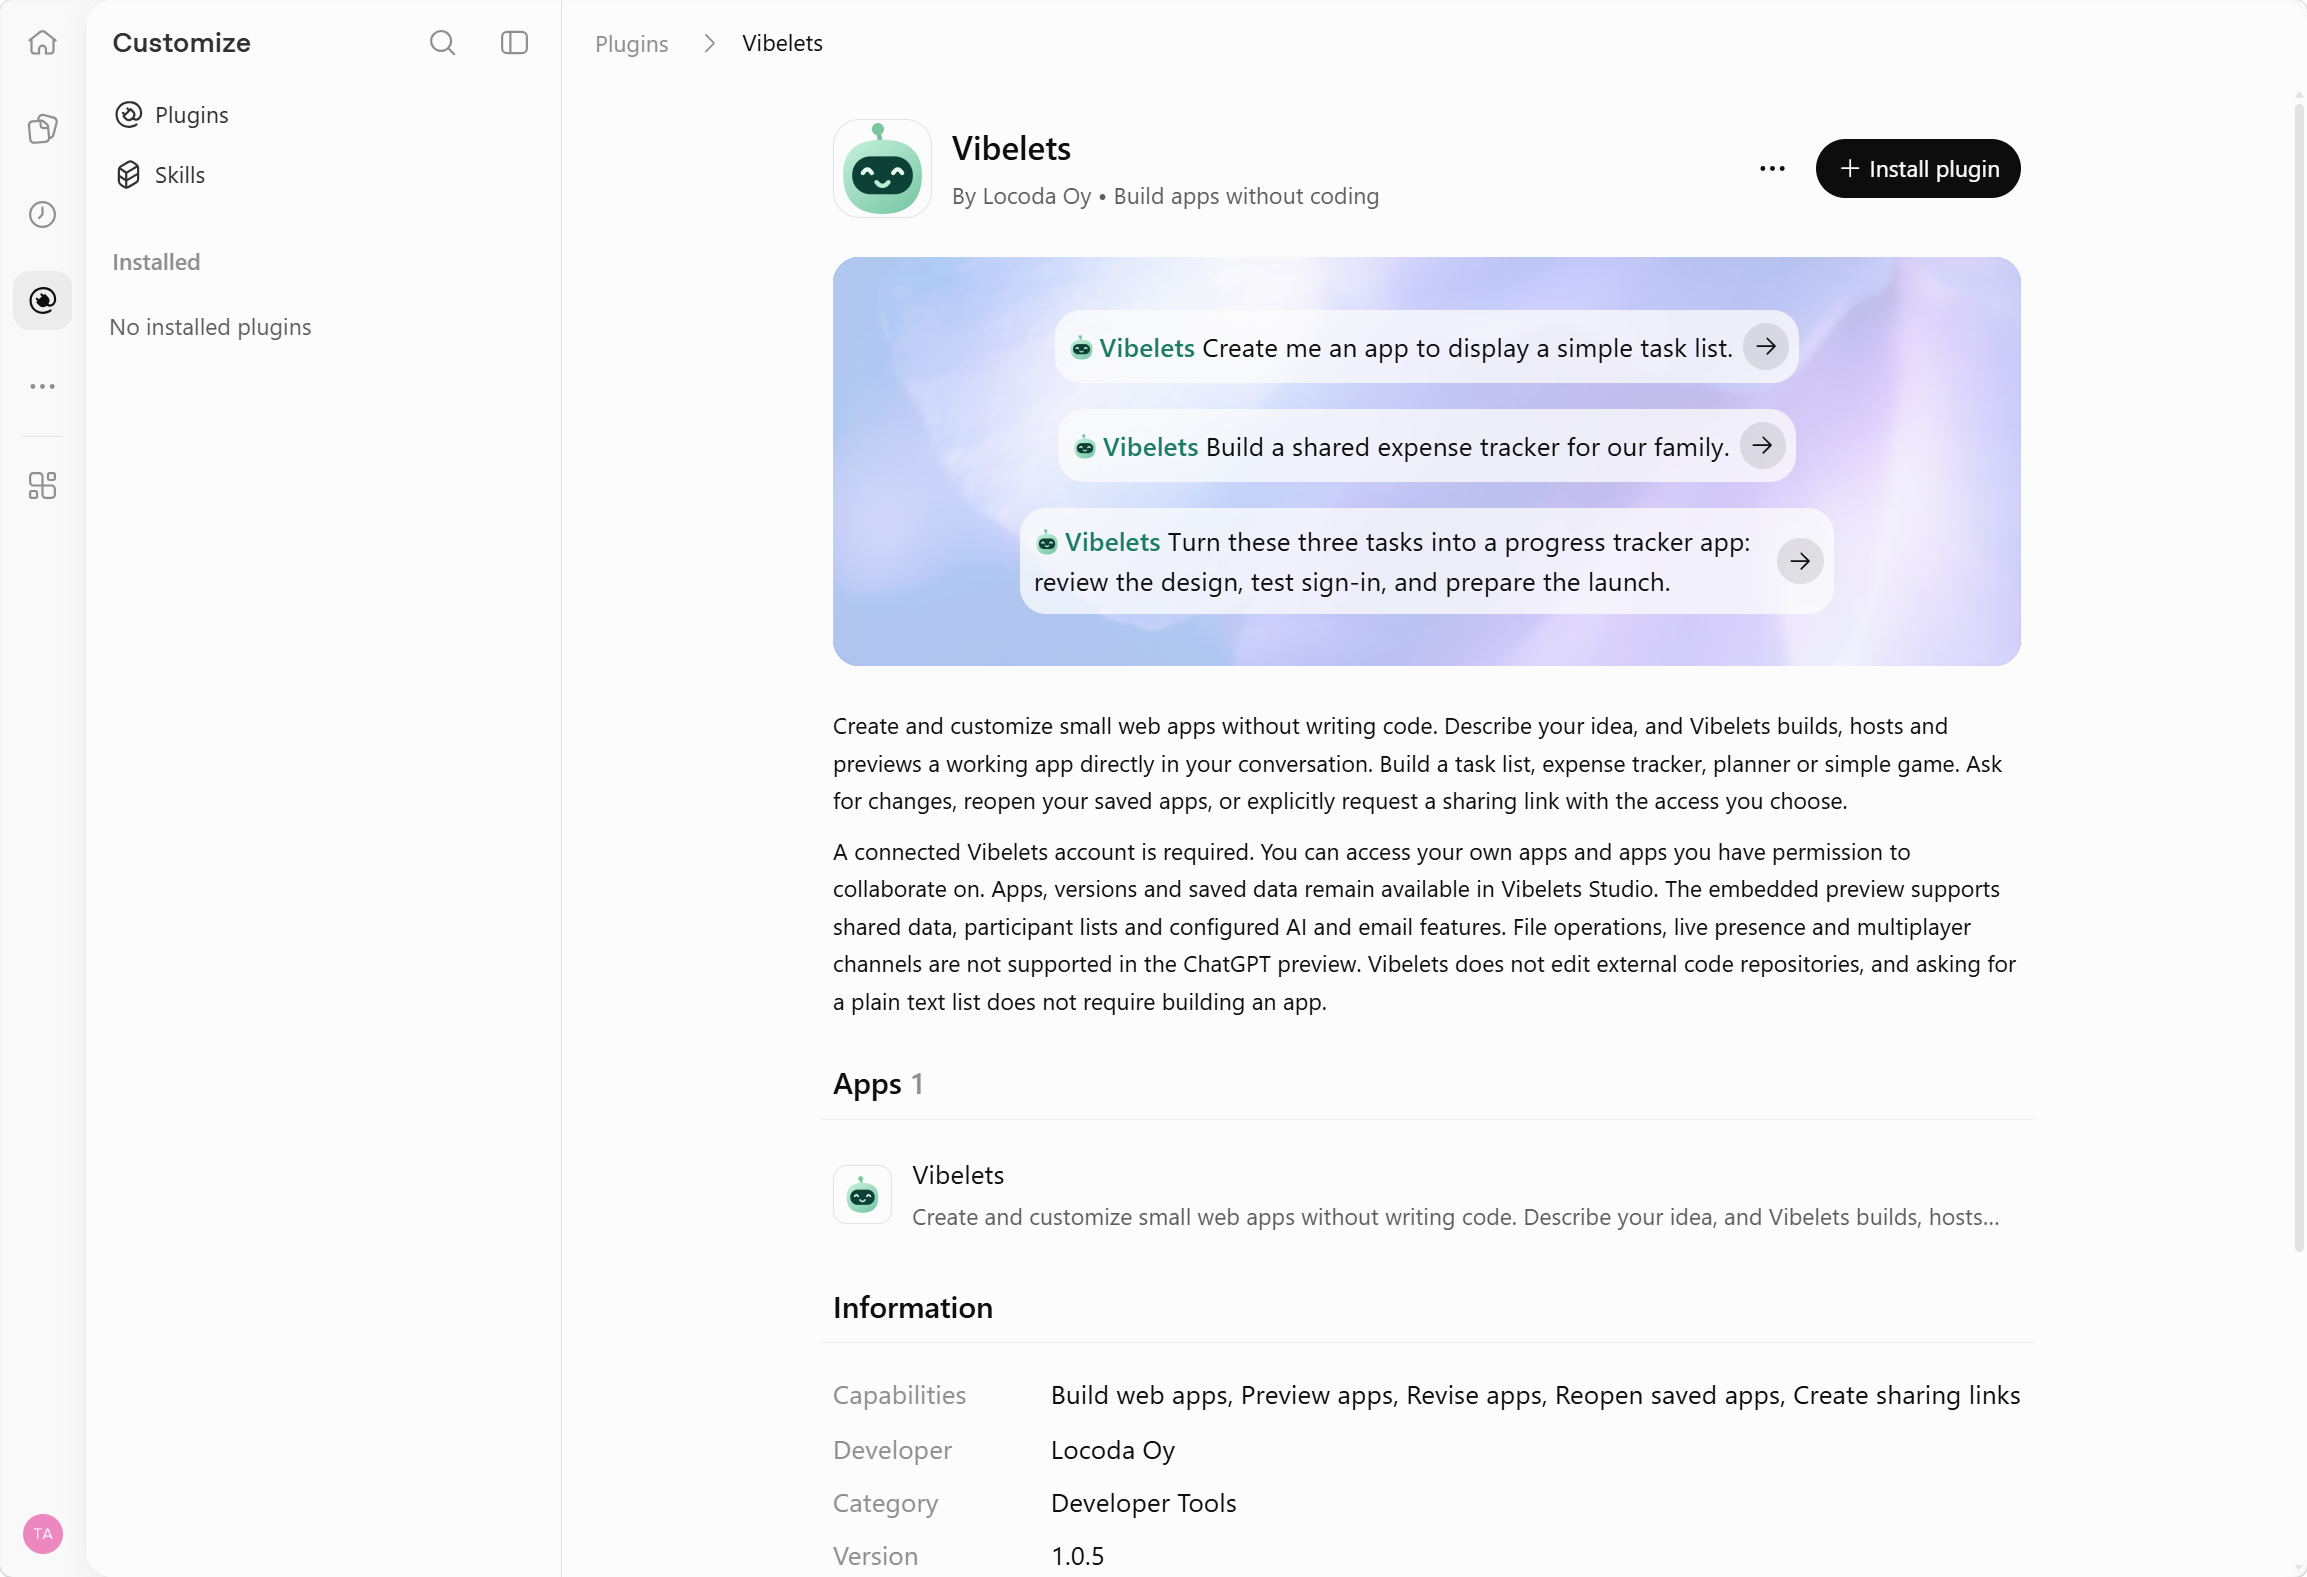
The plugin page shows the Vibelets logo and Locoda Oy as its developer. Connect Vibelets
Review ChatGPT’s connection information, then select Connect Vibelets. This opens the Vibelets sign-in and permission flow.
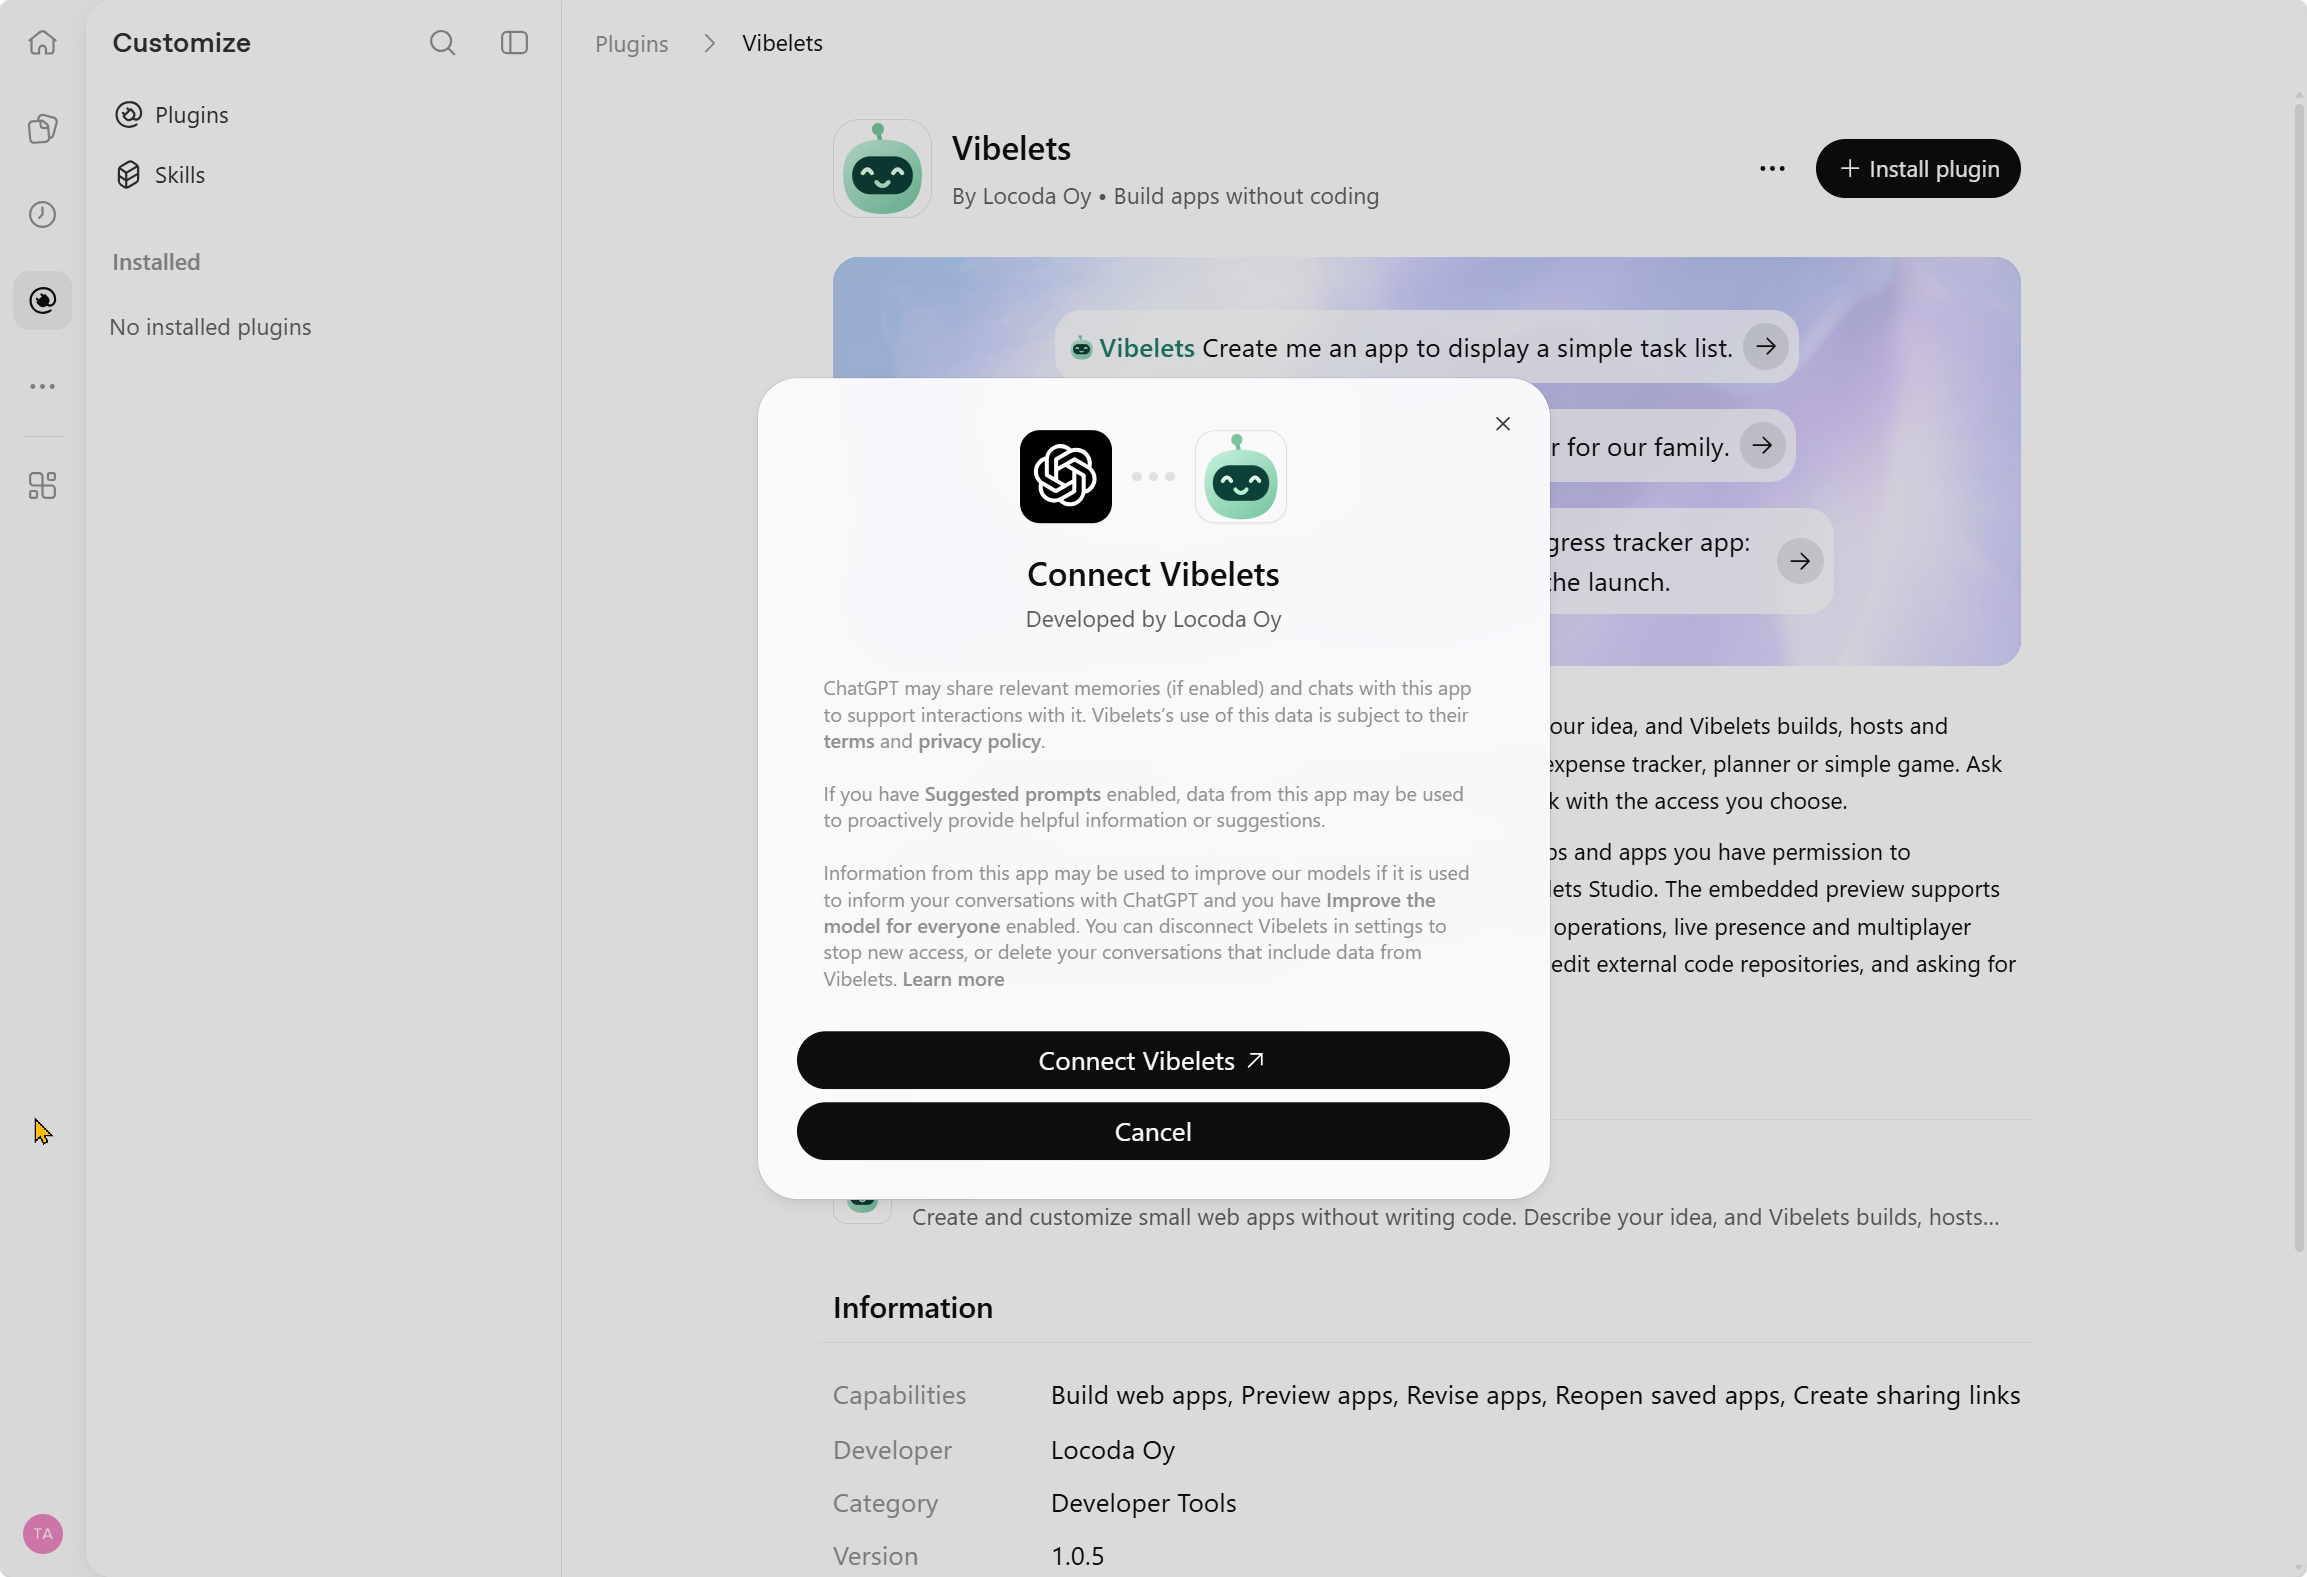
Select Connect Vibelets to continue to your Vibelets account. Sign in or create a Vibelets account
If you already use Vibelets, sign in to that same account. On the Create account screen, choose Sign in instead and use your existing sign-in method.
New to Vibelets? Enter your email and select Next, or choose Google or Facebook. Follow the sign-up steps to create your account.
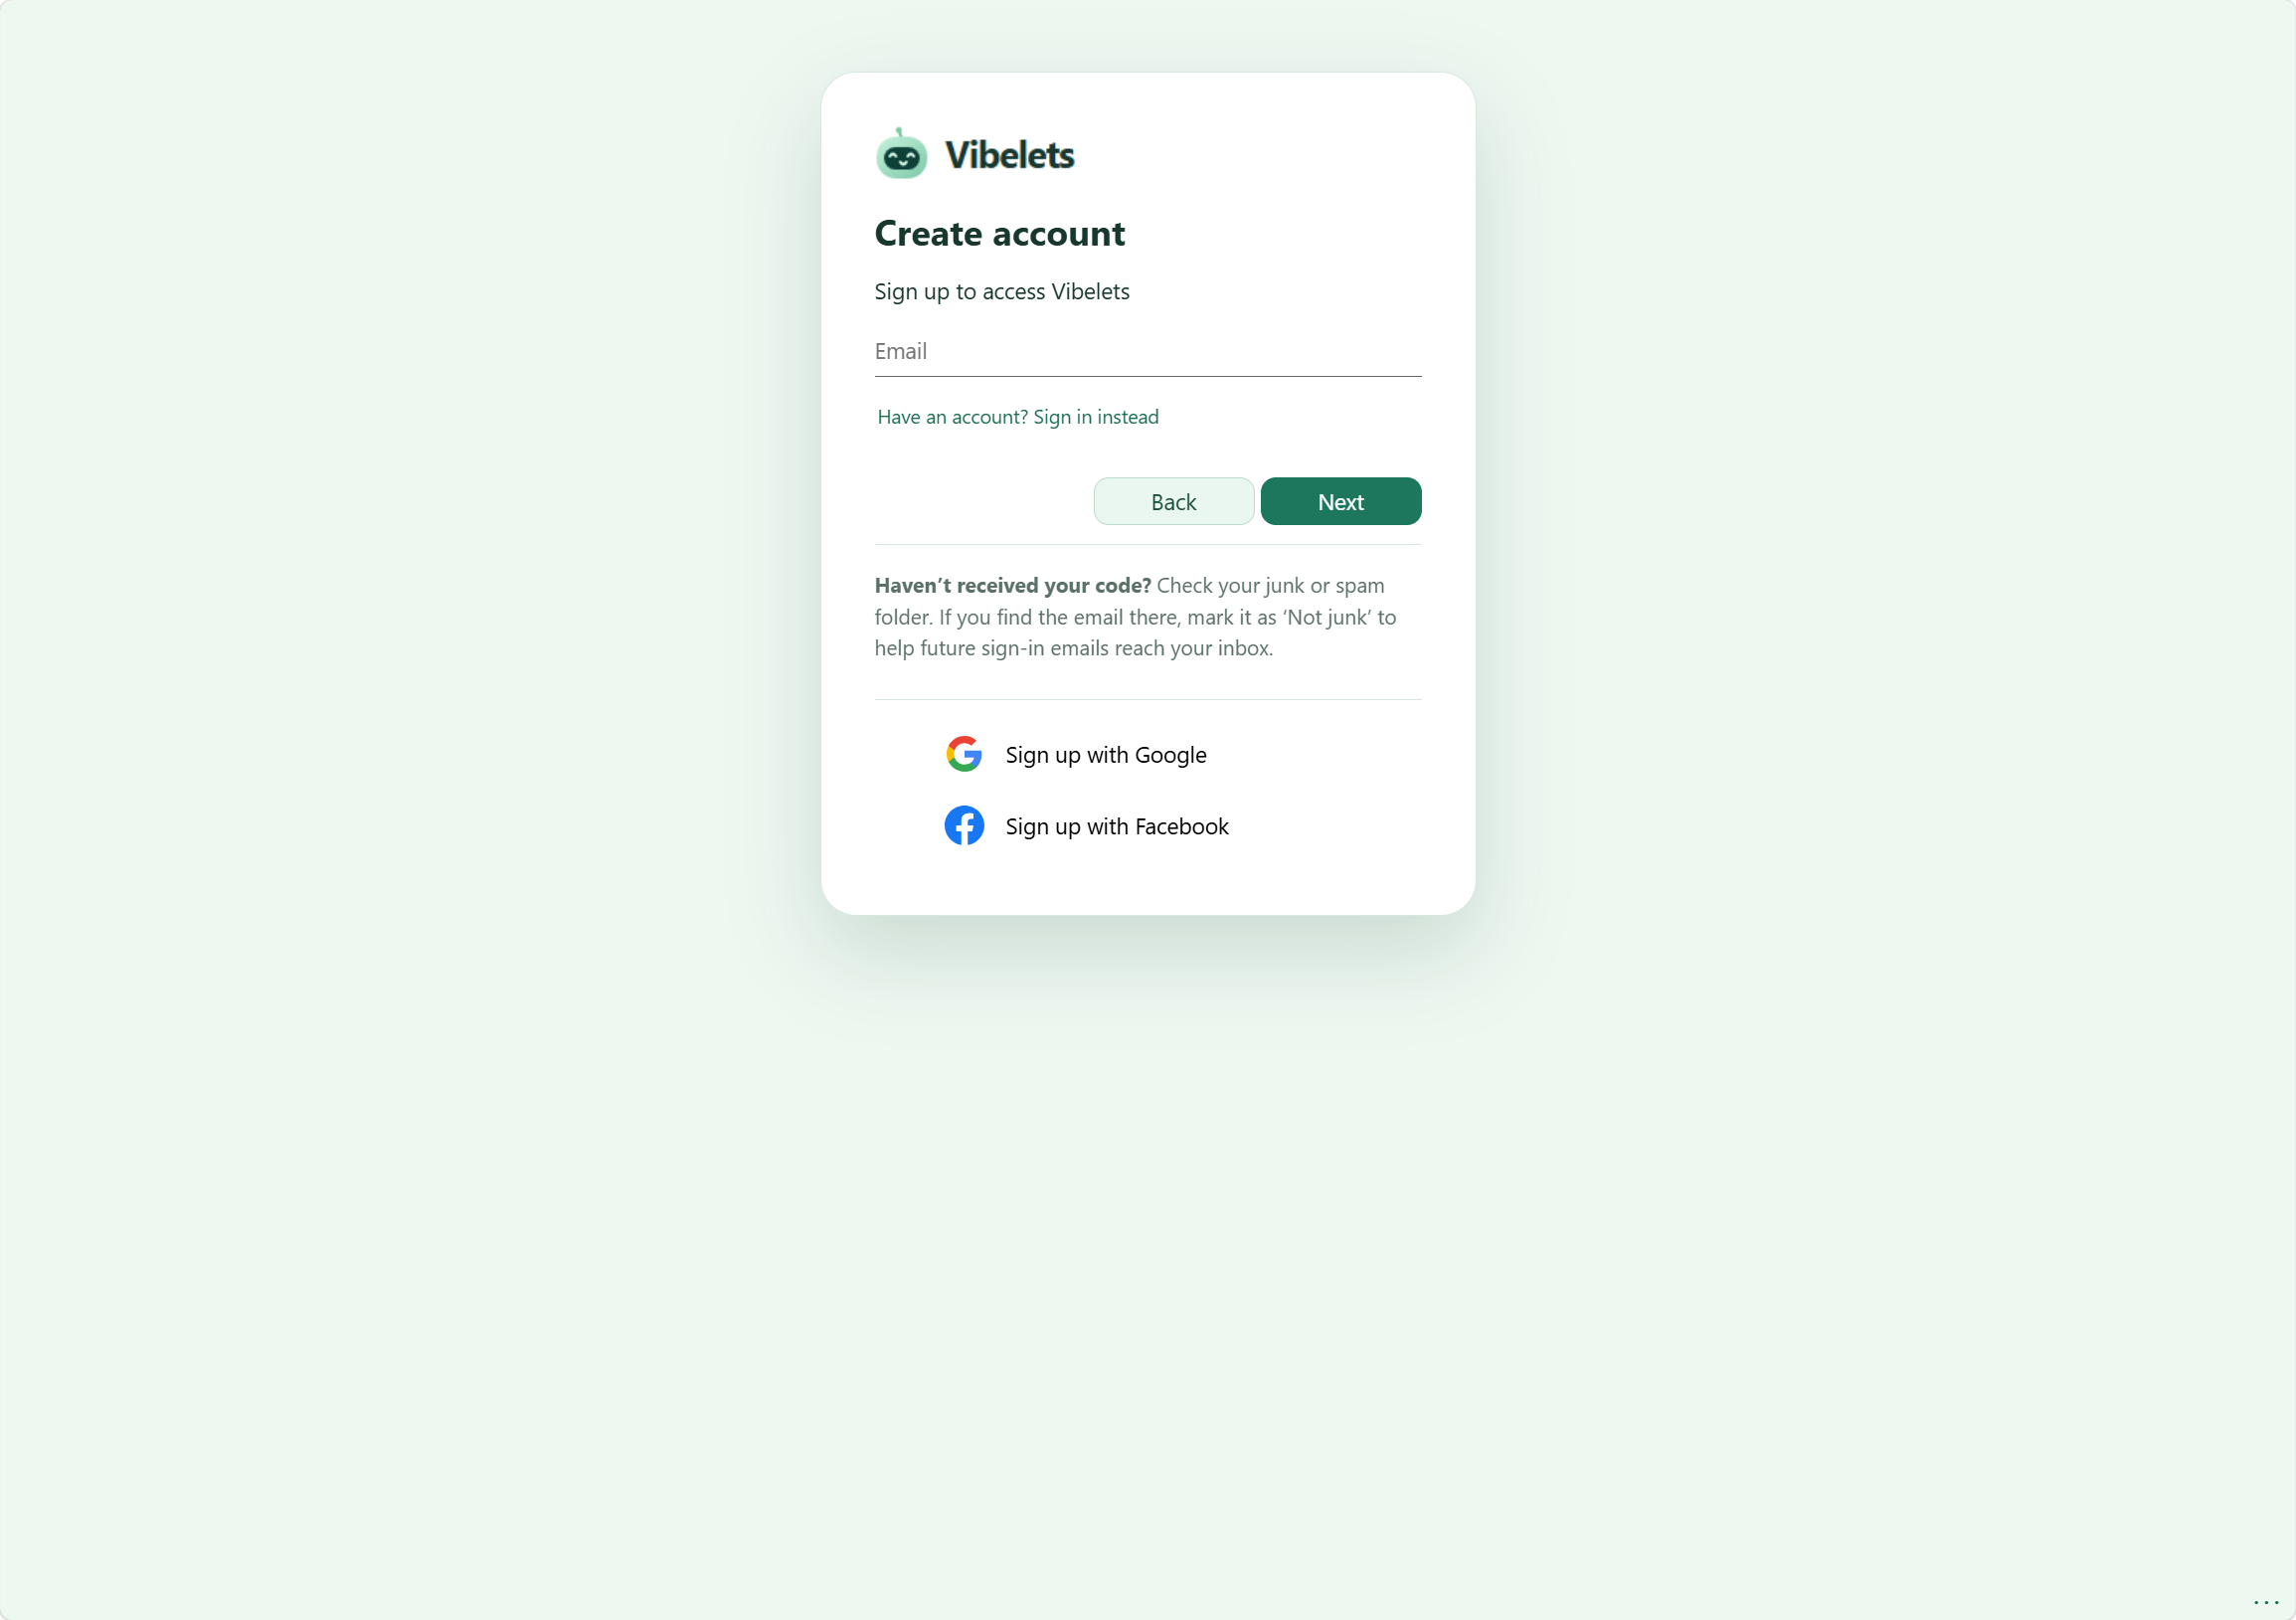
Create an account or choose Sign in instead. If you are already signed in, you can go straight to the next step. Allow the Vibelets connection
On the Allow ChatGPT to use Vibelets? page, check the signed-in account and review the permissions. They cover reading your apps and saved data, building and editing with your Vibelets credits, and creating links when you request sharing.
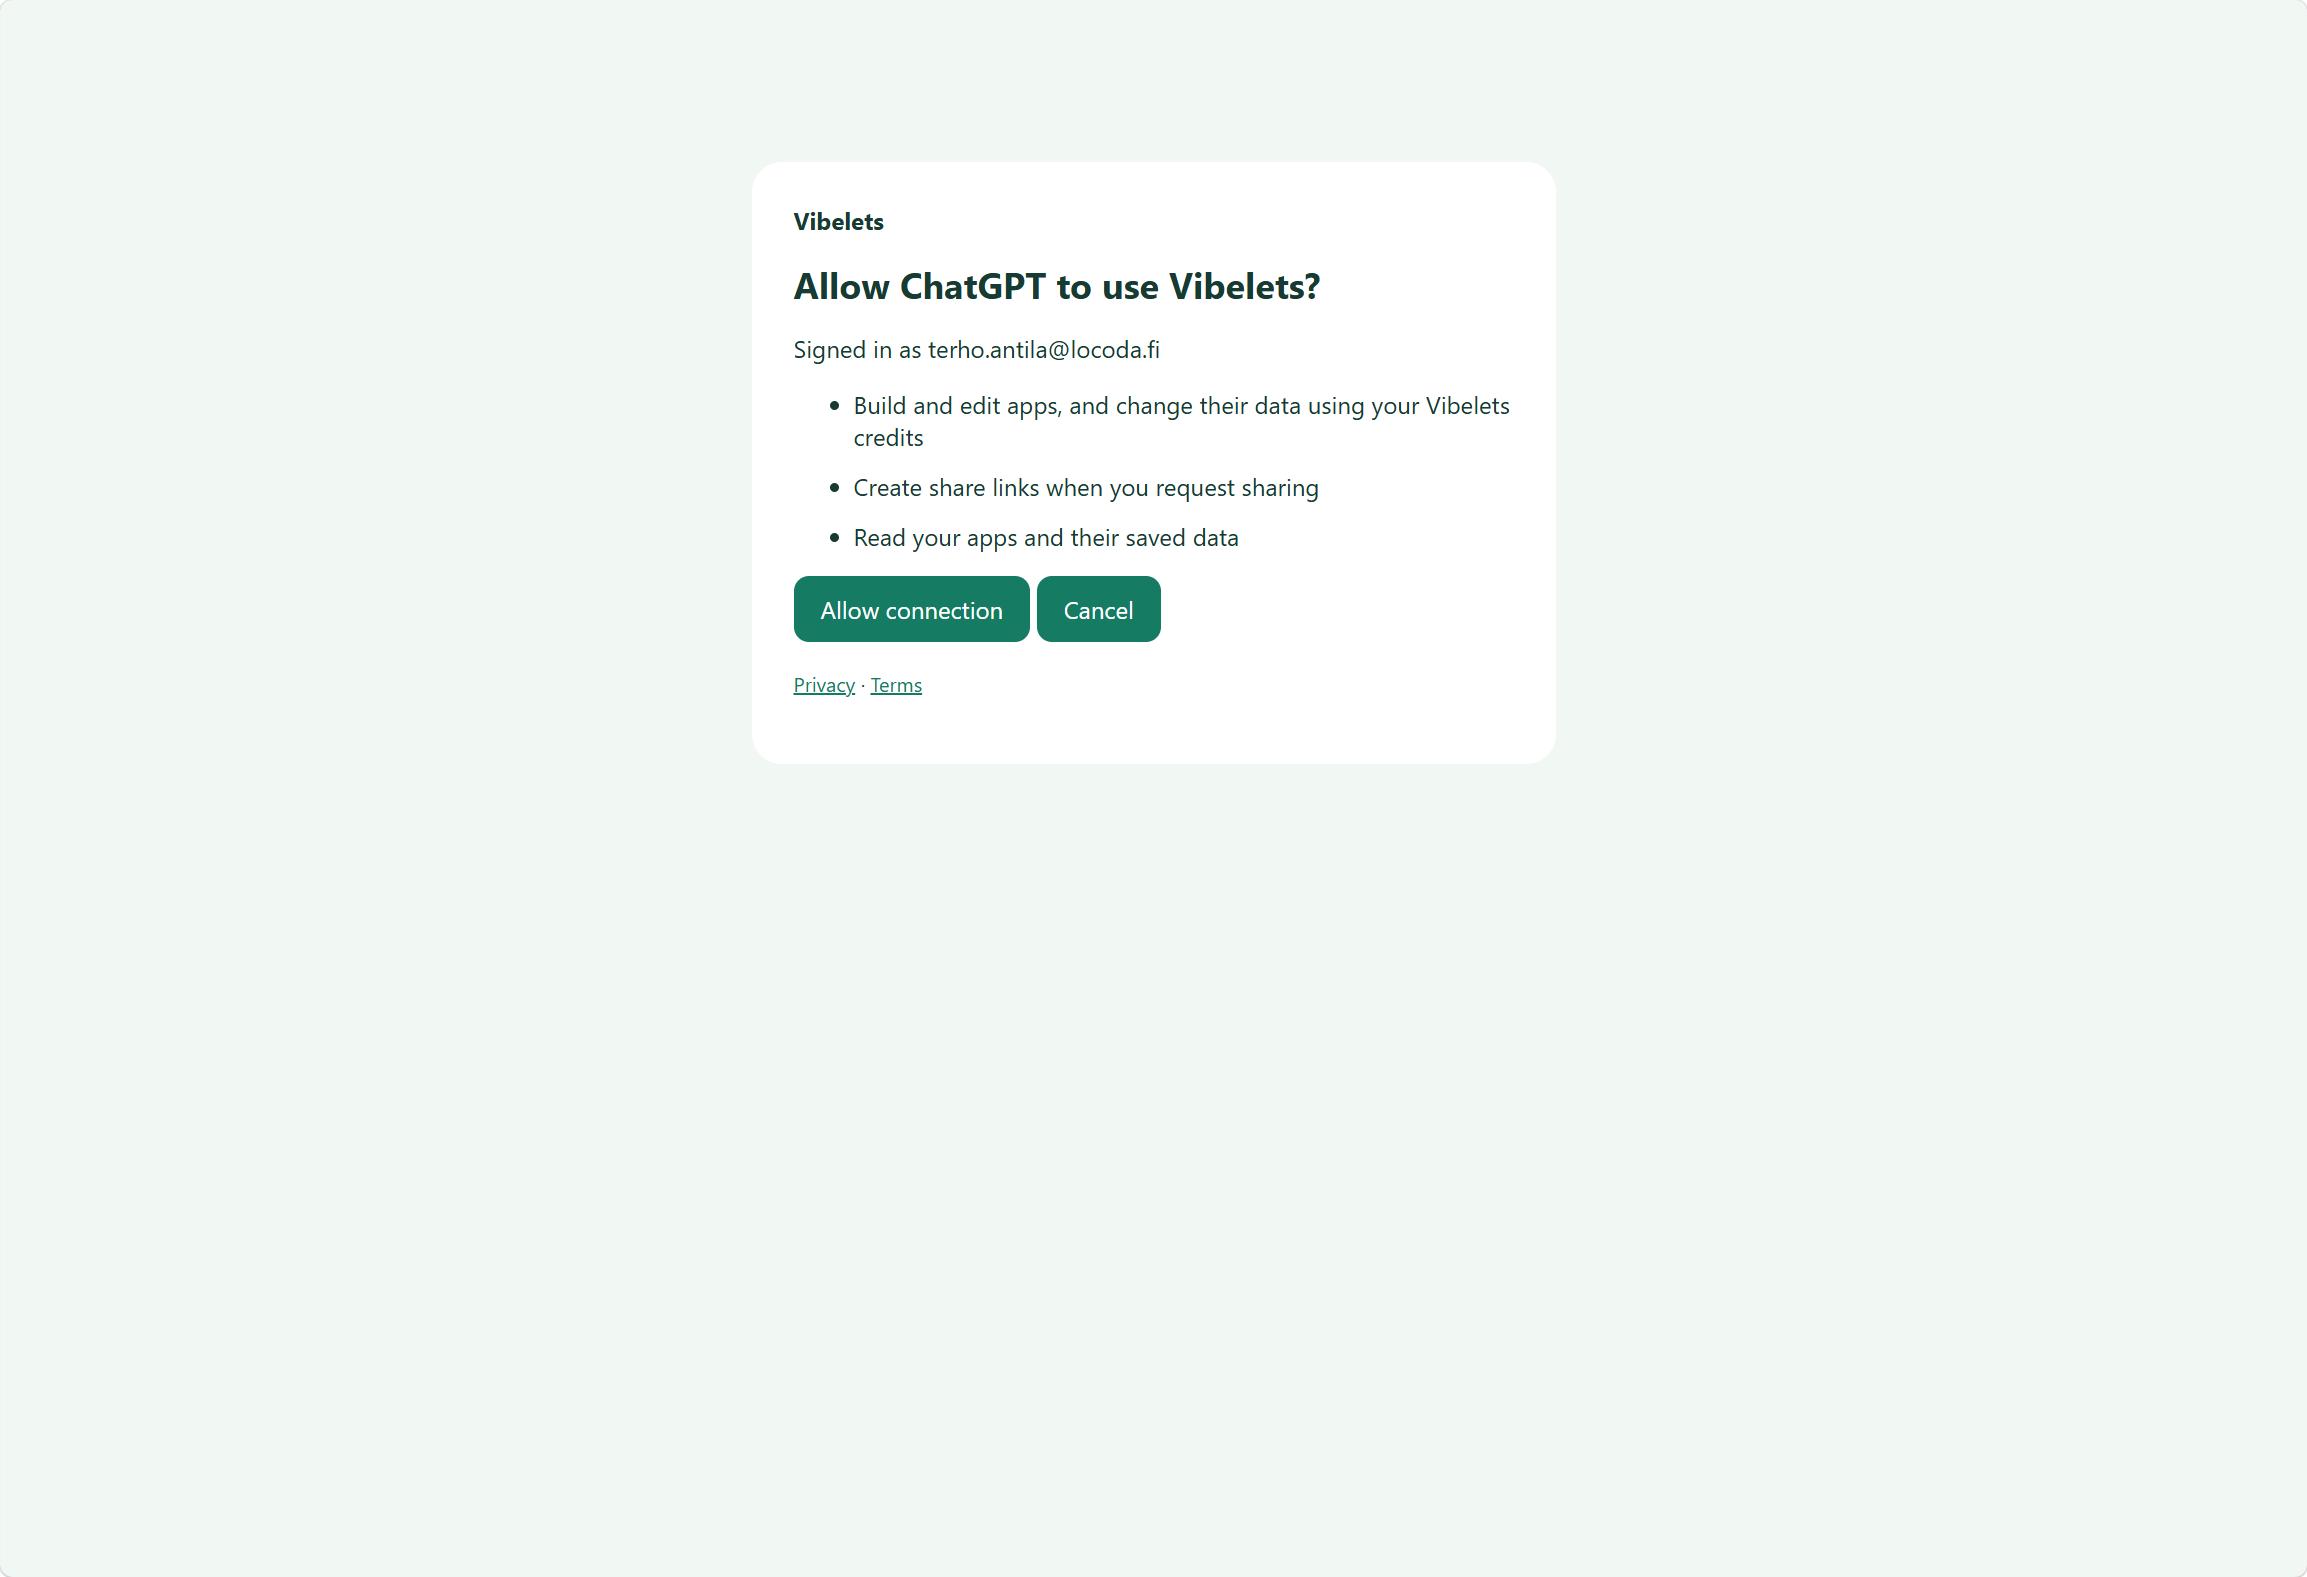
Review the requested access before allowing ChatGPT to use your Vibelets account. Select Allow connection to finish connecting your account.
Open a chat with Vibelets
ChatGPT confirms Vibelets plugin installed. Select Try in chat on the plugin page, or Try now in the confirmation.
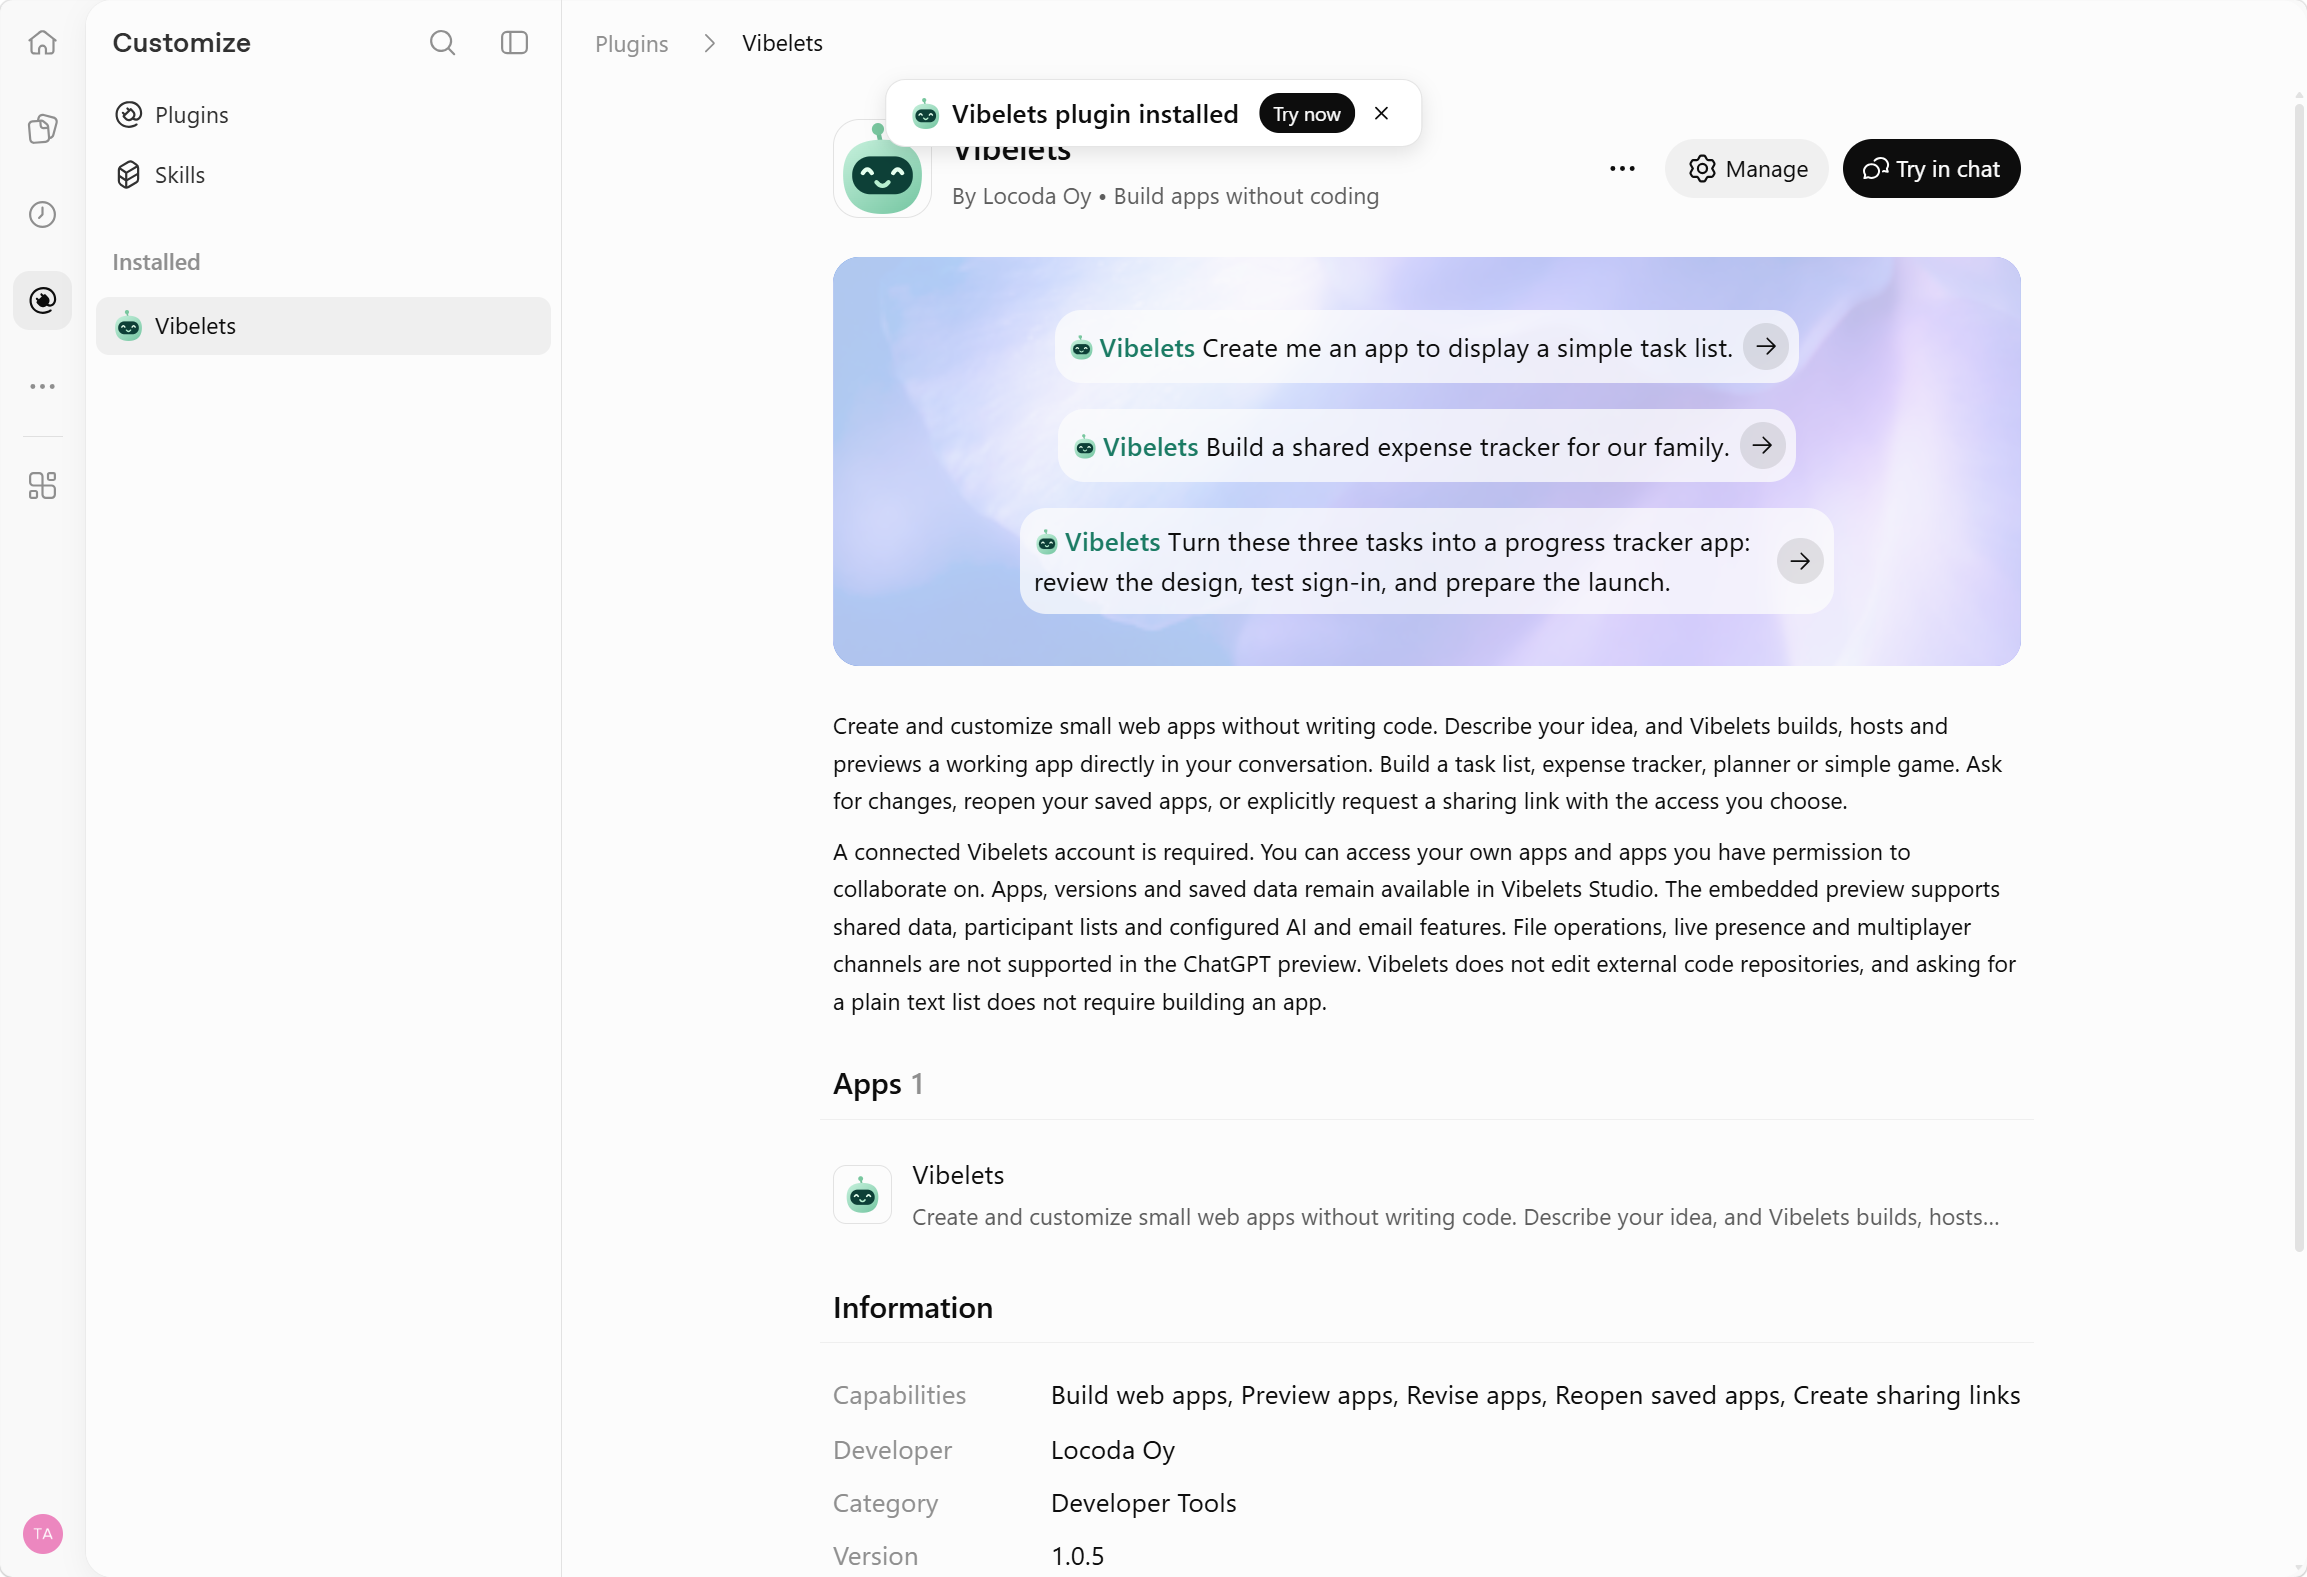
Try in chat opens a conversation with Vibelets selected. Describe the app you want
Make sure Vibelets is selected in the prompt box. In a new chat, you can type @ and choose Vibelets. Send a request such as:
Create me an app to display a simple task list.
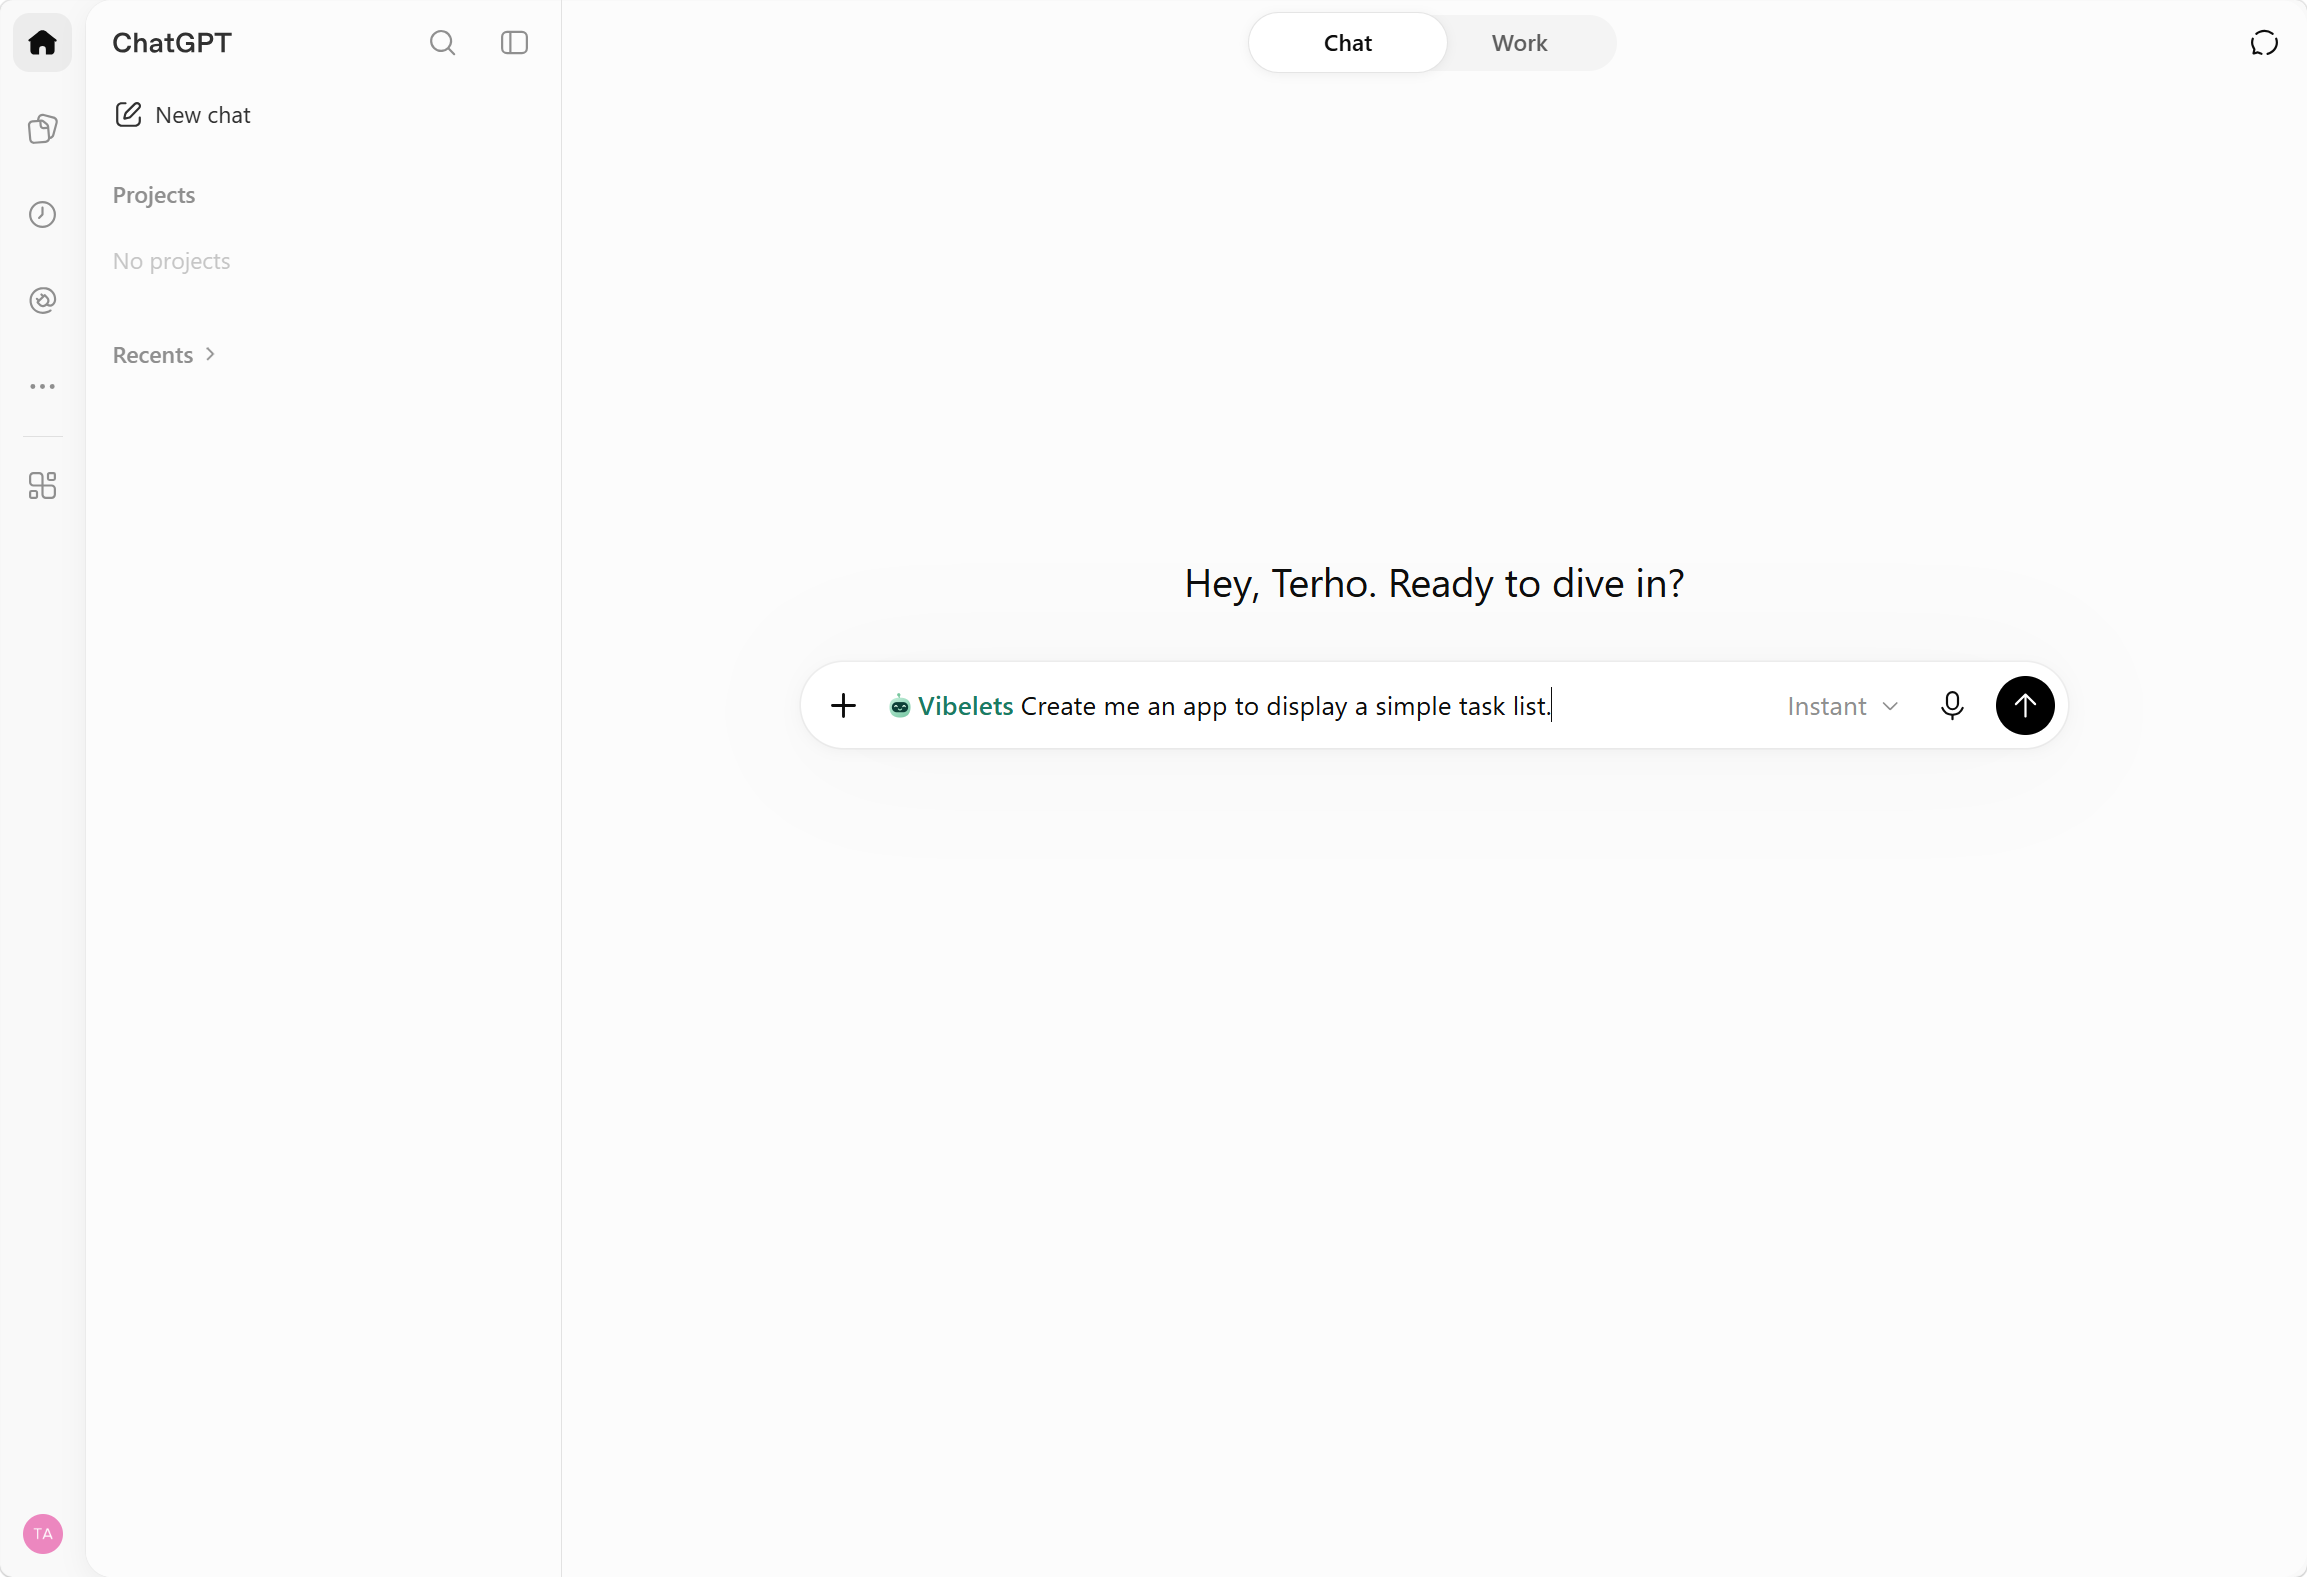
Select Vibelets, describe your app and send the prompt. Try the app in the preview. To improve it, ask for a specific change, such as “Add due dates and show unfinished tasks first.”
Can’t find the plugin or start using it?
Check that you are in the intended ChatGPT account and workspace. Managed workspaces can restrict which plugins you can install; your workspace administrator can check access.
If Vibelets is already installed, start a new chat and select it with @. If the connection asks you to sign in again, use the same Vibelets account.
For a connection or preview error, contact Vibelets support with the visible error and the step where it happened.
Screenshots show the English ChatGPT interface. See also OpenAI’s plugin instructions .